
Overview #
When an Office365 or Exchange Calendar is integrated with your Zoapi Hub, the room’s display shows any upcoming meetings scheduled in that room. You can also view the room’s entire calendar and get reminders for scheduled meetings. You will also be able to start Video Calls with a single click.
The process to integrate an Office 365 calendar is a wee bit involved. Please go through the steps carefully to ensure that it works as expected.
This document has three parts:
1) Configuring the Office 365 integration for your Meeting Room
2) How do you know if it’s working?
3) Common Problems and their Solutions
Configuring the Office 365 integration for your Meeting Room #
There are two main parts to configuring the meeting room:
- Share the Room Resource Calendar to a Delegate
- Use the Delegate account to integrate the calendar into your Zoapi Hub device
PART-I: Share the Room Resource Calendar to a Delegate #
As a privileged account or an account that has Mailbox Delegation rights, open the Resource Calendar:
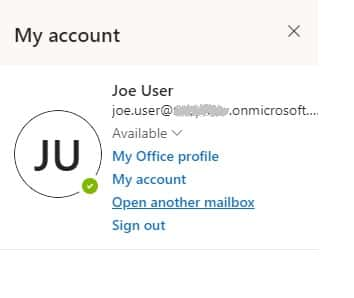
- Click on the account label and select Open Another Mailbox:
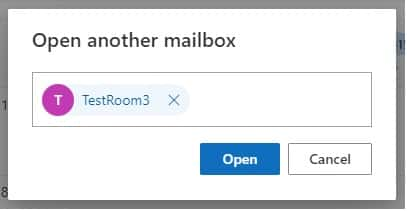
- Enter the resource calendar id and click Open. This should open the resource calendar:
- In the Resource Calendar window, click on settings > View all Outlook settings:

- Under Resource scheduling, go to Scheduling permissions
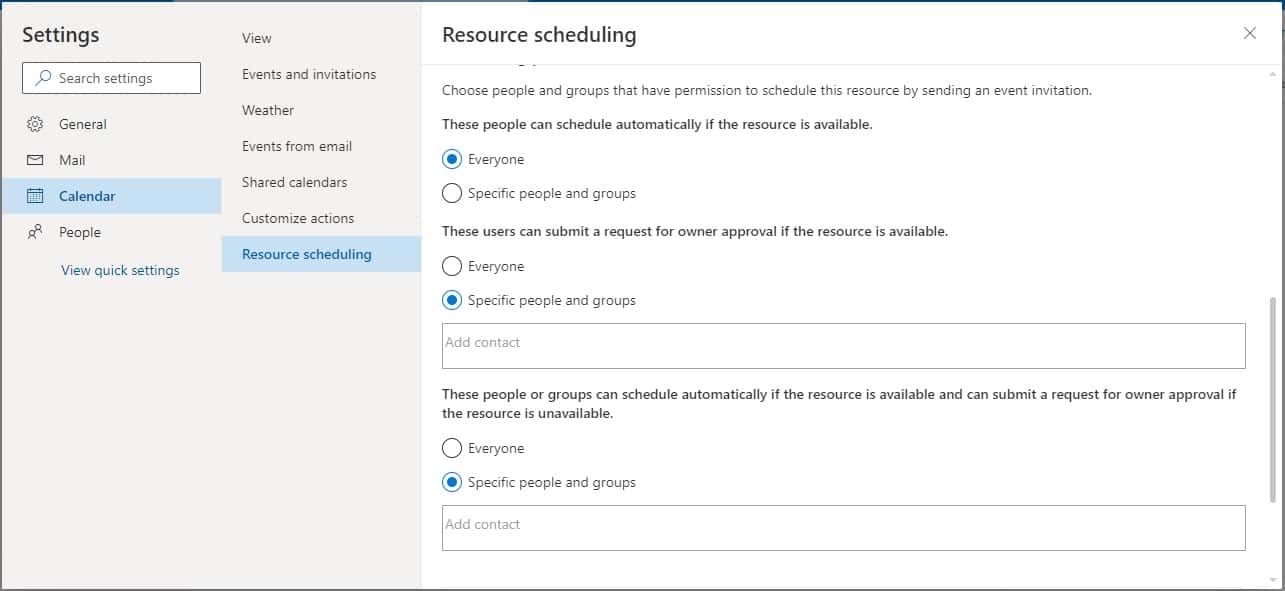
The expected values here are:- These people can schedule automatically if the resource is available: Everyone
- There users can submit a request for owner approval if the resource is available: Specific people and groups
- These people or groups can schedule automatically if the resource is available and can submit a request for owner approval if the resource is unavailable: Specific people and groups
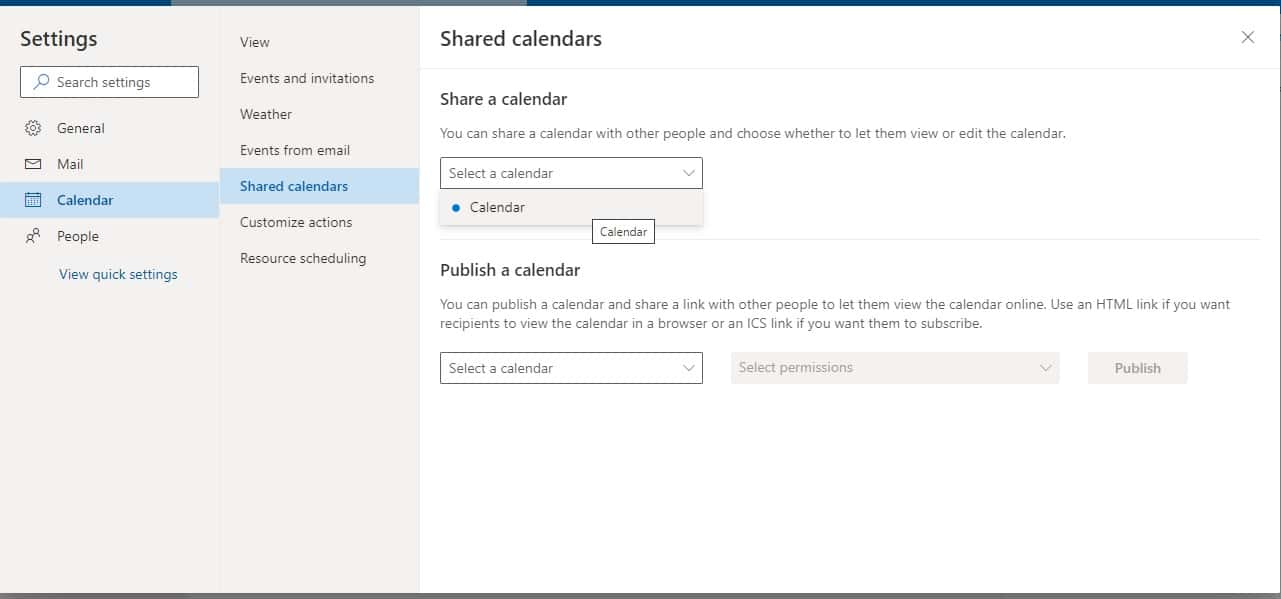
- Select Shared calendars and under Share a calendar select the available calendar:
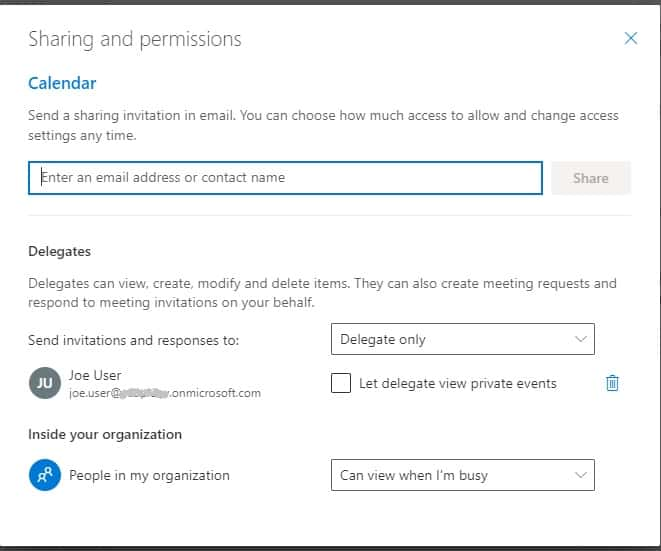
- Under Sharing and permissions, add the delegate account, as Delegate Only:
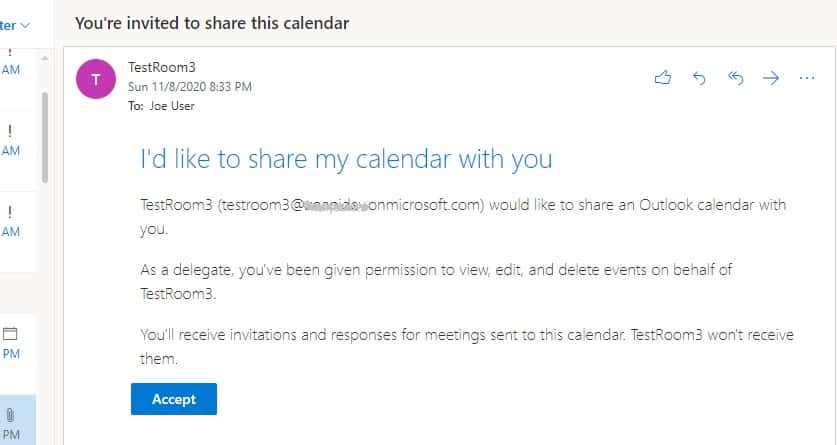
- The delegate user will receive an email. Click on Accept:
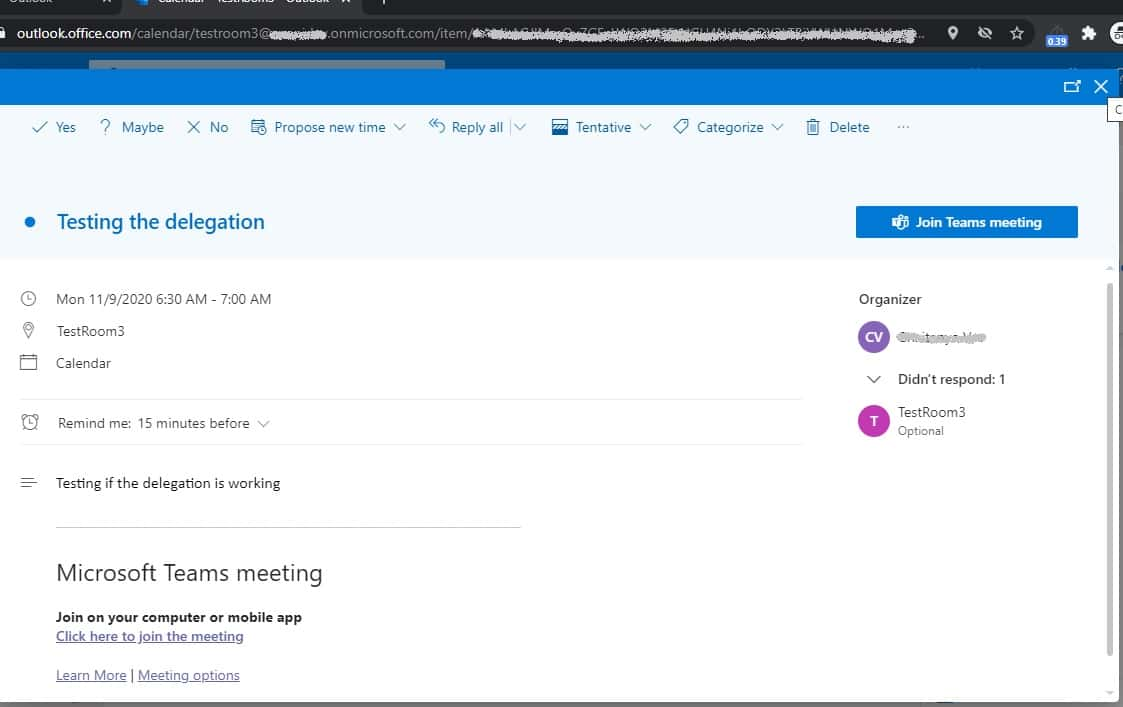
- Confirm that the delegation is working – Book a meeting as any user with the room resource as the destination. The meeting details should appear in the resource calendar that we just opened with title and description:
PART-II: Use the Delegate account to integrate the calendar into your Zoapi Hub device #
- Sign into your Zoapi Dashboard (https://share.zoapi.com/dashboard)
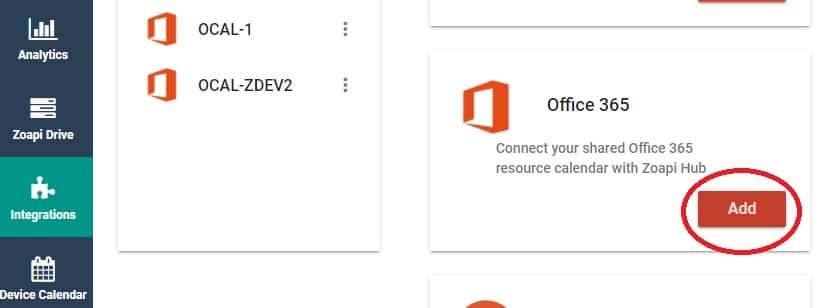
- Under integrations, add an Office 365 integration if you haven’t added one already:
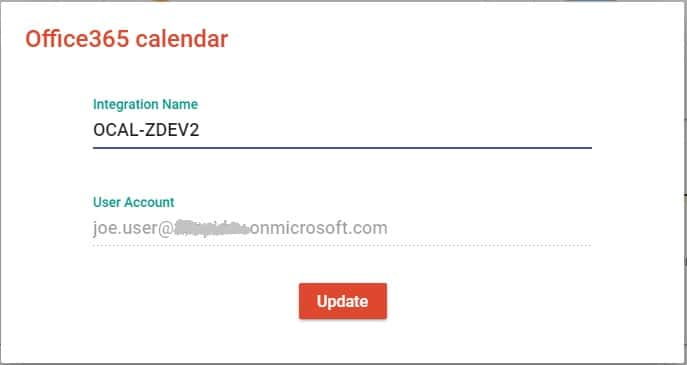
- When asked to sign in, use the delegate account. For our setup that is joe.user@xxxx.com
- Office 365 might automatically sign you in without asking for permissions. You can confirm the account used to sign in, by clicking on Update on the Integration Name:
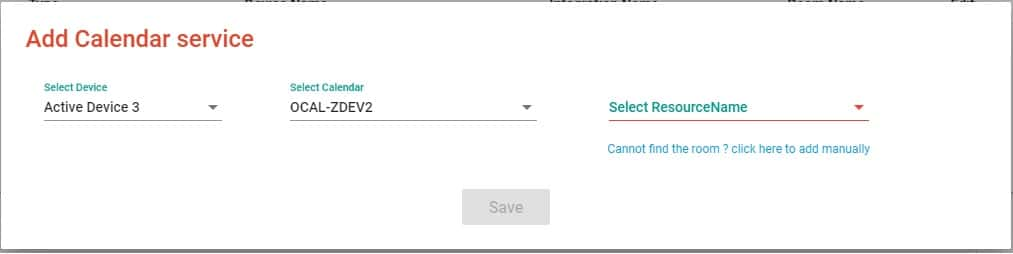
- Map device to the resource using the integration:
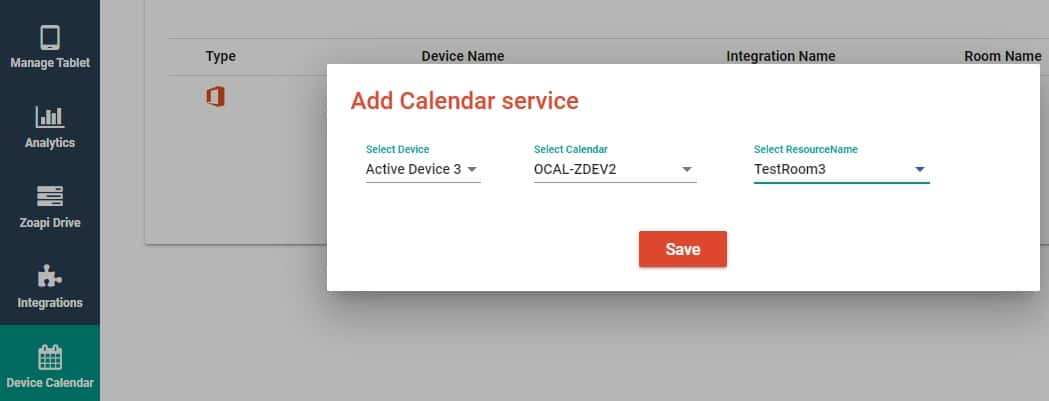
- Click on Save, and you are done!
How do you know if it is working? #
We will book a meeting and then show you how to confirm that the integration is working.
Booking a Meeting
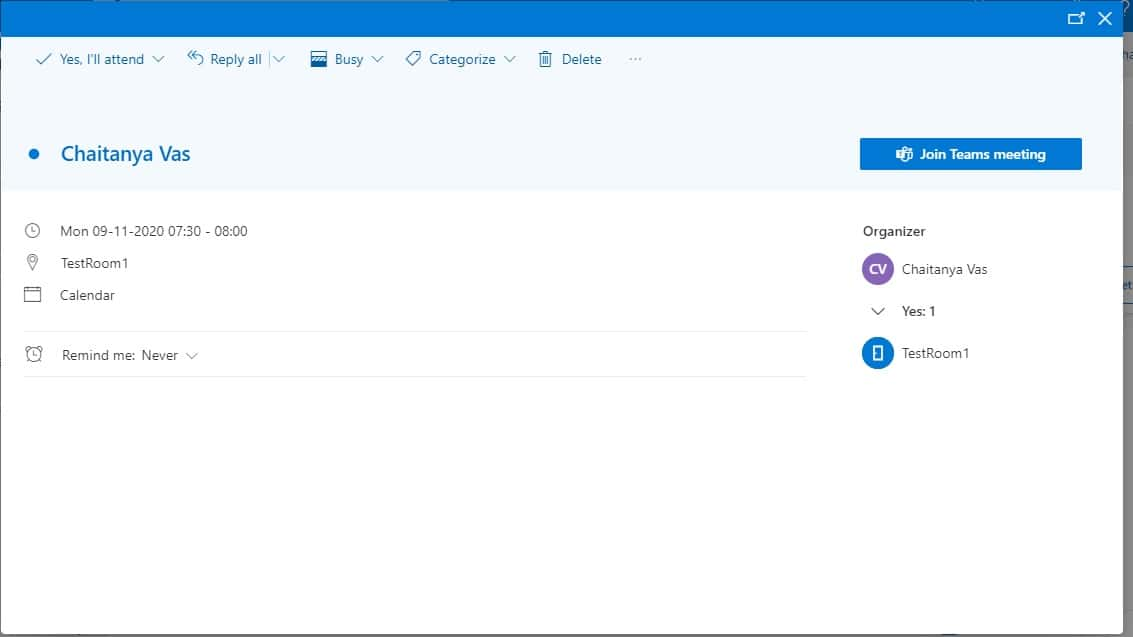
Let’s say, our user Joe wants to book a meeting in the room Test Room 3. We go about booking the room the usual way, from outlook:
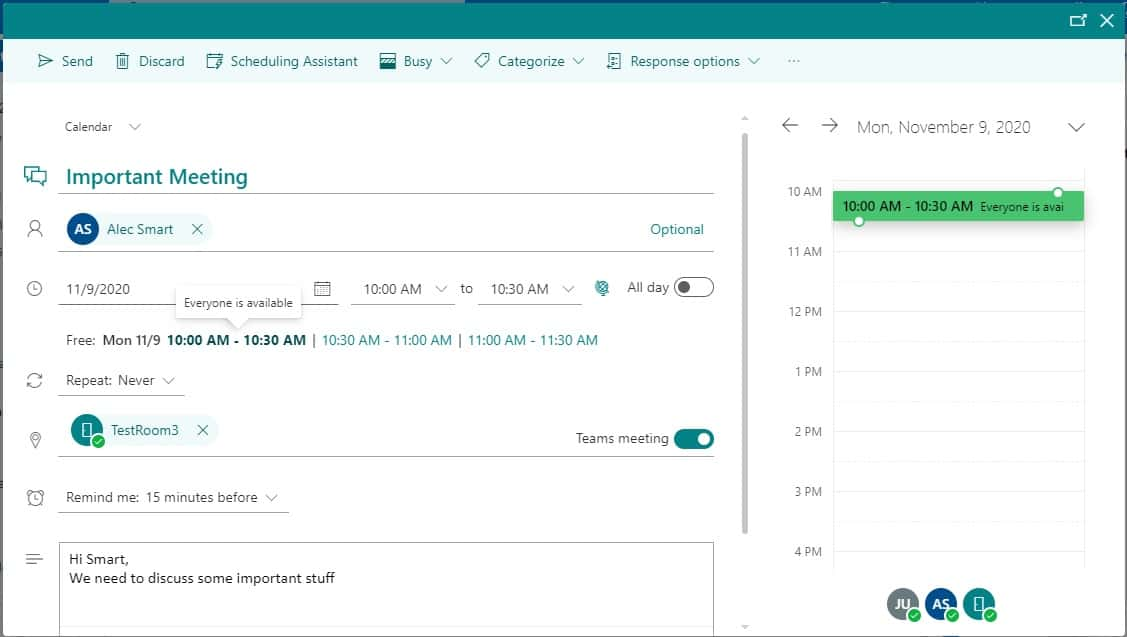
So, this meeting has:
a. Title: Important Meeting
b. Scheduled between 10.00AM and 10.30AM on the same day
c. Scheduled in location: TestRoom3
d. Includes a Teams Meeting link
What should happen:
In case you have configured everything right:
- On clicking on send in outlook – a widget will appear on the info-bar of your Zoapi Hub. This should appear within a minute:
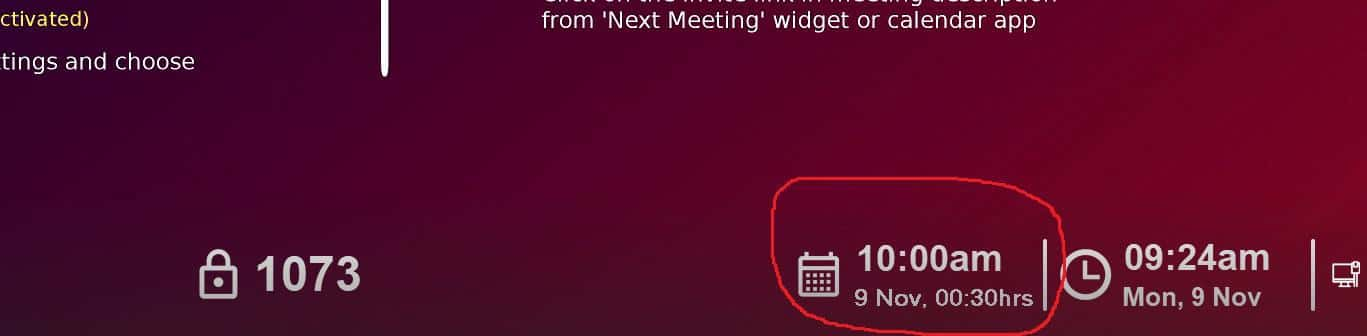
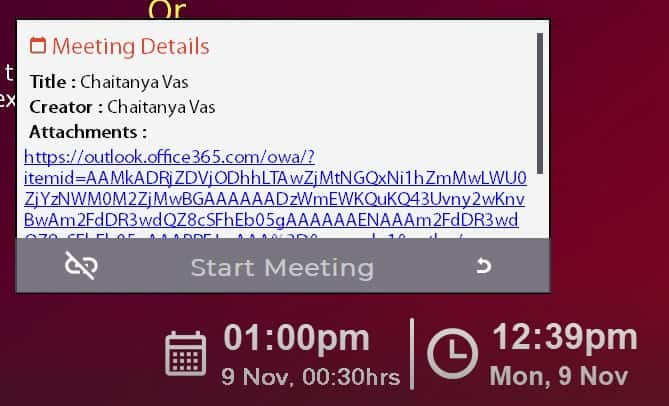
- On hovering over the widget – a Meeting Details popup will appear:
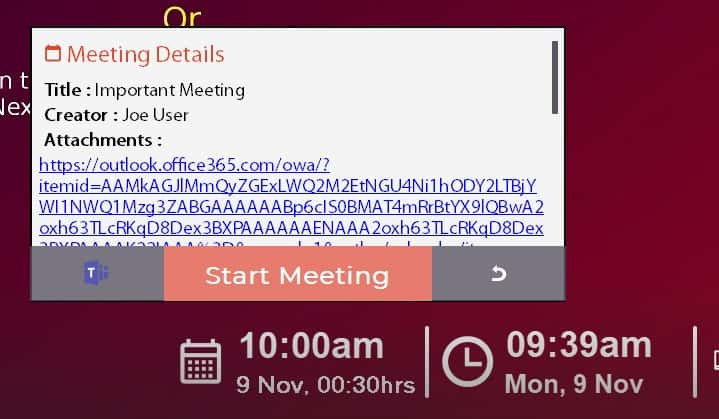
The popup will have these details:
• Title of the Meeting
• Organizer
• Since the message body contains a Teams link – you will see the Teams icon as well as the Start Meeting button will be enabled. If you copy a zoom link, it should show a Zoom icon. - On cancelling the meeting, the widget should disappear within a minute:

If you see all of the above, then the configuration was successful.
In case, some of the above are not working, check out the common problems section for possible solutions.
Common Problems and their Solutions #
- Problem: I am an Admin user, but I am not allowed to open the meeting room resource calendar, when I select Open another Mailbox.
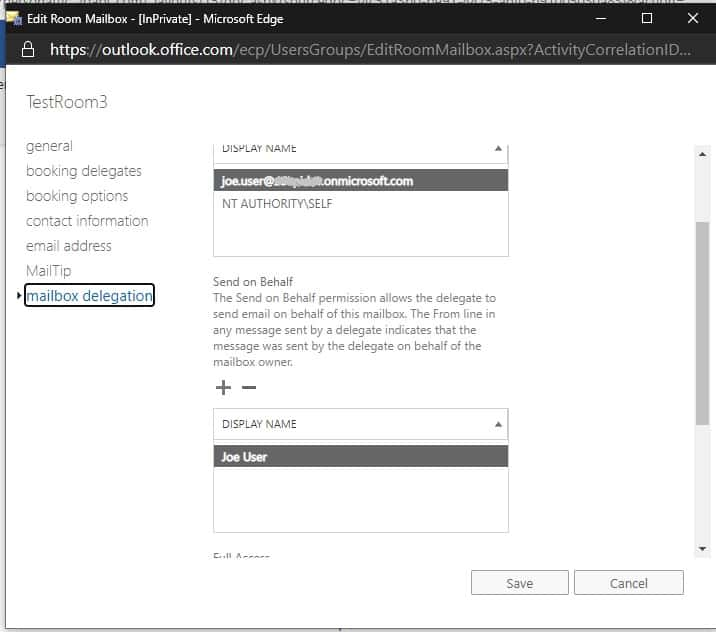
Solution: You might not be able to open the resource calendar if you do not have delegate rights on the mailbox. Even Admin users do not have Delegate rights on mailboxes by default. You can add delegate rights from the Exchange Admin Center.
On the old Exchange Admin Center: go to recipients > resources, select the meeting room resource and click on edit.
Select mailbox delegation and add the account-name under Full Access.
This works for non-admin users too. You may give them Send As and Send on Behalf permissions too, if you want to use this account for the integration.
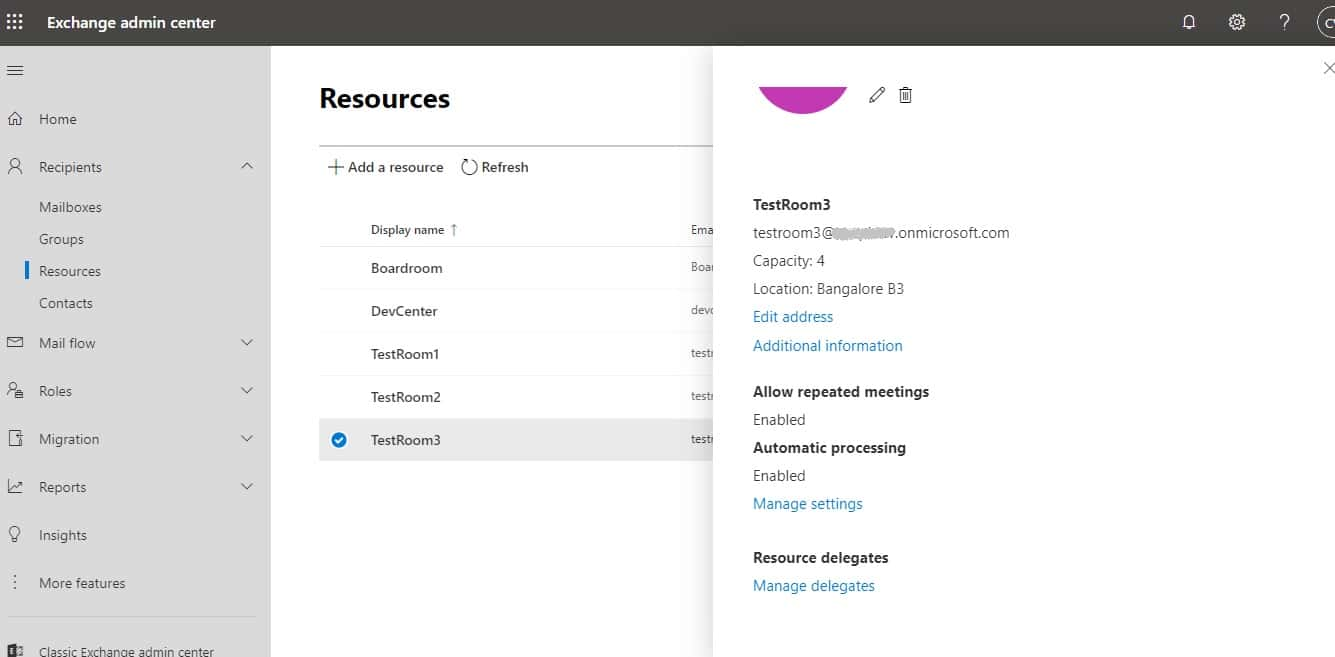
On the new Exchange Admin Center – Select Resources > Room Name > Manage Delegates and add the delegate account.
Sometimes it takes an hour or two for the permissions to reflect. - Problem: I just added an account as a mailbox delegate. I still get an error message when I try to open the mailbox.
Solution: We have seen it take a few hours at times for the permissions to start reflecting. Try waiting a bit and then retrying. - Problem: The meeting widget has appeared, but when I hover or click on it, nothing happens.
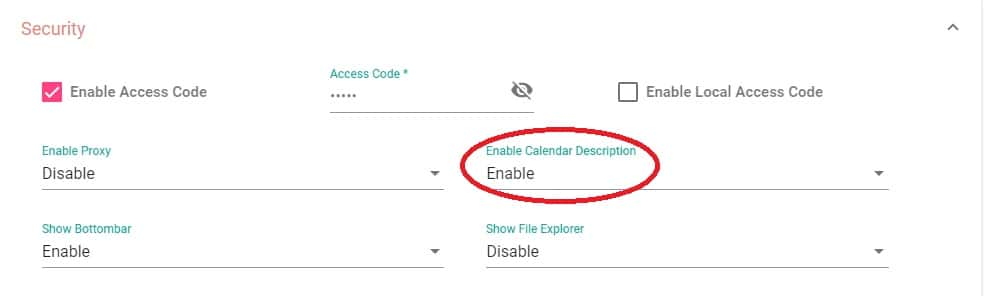
Solution: Make sure Enable Calendar Description is selected under Security settings.
- Problem: The meeting widget shows the organizer’s name instead the meeting title and the Start Meeting
Solution: The title, and Meeting Description will not appear, if the account is not a Delegate user of the meeting. You can confirm this by opening the calendar and confirming if the meeting title and description is appearing here. In this case, as you can see the details are missing:
Follow the instructions given under PART-I: Share the Room Resource Calendar to a Delegate carefully. - Problem: The meeting widget does not appear on booking a meeting. The widget only appears on restart or cleanup.
Solution: Possible problems and their solutions:
A) Check if the meeting details are shown when you hover over the details. If the details are not visible, you need to delegate the calendar.
B) The Room Resource has been delegated but not as Delegate Only. - Problem: No widget is appearing, even after restart
Solution: Possible Solutions:
A) Check if the meeting room is delegated with Delegate Only rights.
B) Look in the delegate account’s email for meeting invites. RSVP the meeting with a Yes. Check if the event appears immediately. If it does, then check the Scheduling Permissions and make sure they are as per the instructions given under PART-I: Share the Room Resource Calendar to a Delegate - Problem: The meeting widget appears automatically on booking the meeting, but the calendar details are not shown
Solution: Possible solutions:
A) Check if the meeting room is delegated with Delegate Only rights
B) Make sure the Accept button was clicked in the email sent after the room was delegated - Problem: While adding a Calendar Service, I don’t see my Room name
Solution: Possible Solutions:
A) The list only shows Room Resources. If you want to add a personal calendar, it won’t be available in this list.
B) The list will show around 50 Room Resources. Many large organizations have many more rooms. Just click on Cannot find the room? Click here to add manually and use the resource id/name to add the room.
C) If you just added the resource, Office365 might take some time to make it available for integration. Just wait and try again. - Problem: Everything worked for about 30 minutes. But now I don’t see the meeting details.
Solutions: After delegating the room resource, office 365 service will send an email. You need to click on Accept in the email message, or else the delegate rights are revoked after about 30 minutes.


