
Overview #
When a Google Calendar is integrated with Zoapi Hub, the room’s display shows the upcoming meetings scheduled in the room, giving reminders when the meeting is coming to a close. You will also be able to join your Video conferencing calls using Zoapi’s single click join. Authorizing Zoapi to have access to Google Calendar, also allows members of your organization to view all the bookings of that room in your Zoapi Room Scheduler app.
Prerequisites #
To share a Google calendar with Zoapi Hub, you will need to sign in to the Zoapi Hub using an account which has access to your calendar resources.
Typically an admin account has access to all the calendar resources in your organization. The sign-in process will use the OAUTH 2.0 authentication scheme and no passwords are shared with Zoapi.
However, if you are not comfortable using your admin account with Zoapi, you could do one of the following:
- Use an existing account, share all calendar resources with it and use this account for Zoapi integration
- Create a new google account, share all calendar resources with it and use this account for Zoapi integration
Steps to follow #
- Configure the Google account
- Create a new Google user account (not mandatory)
- Create calendar resources (if you have not created them already)
- Share calendar resources with the account to be used with Zoapi
- Create integration in the Zoapi dashboard
Configure the Google Account #
Zoapi will use a Google user account to get the list of calendar resources that are available to that account and receive calendar events for that account. This account could be an existing account or a new account.
Creating a new Google user account
Create a new Google account if you don’t want to reuse any existing Google accounts to sign into Zoapi.
To create a new account, you need to add a new user. Follow instructions provided here to add a new user: https://support.google.com/a/answer/33310?hl=en
Creating a Resource
In case you haven’t created calendar resources for your google account already, create them. Follow instructions provided here: https://support.google.com/a/answer/1033925. This step requires access to the Google Admin account.
When you create a new Calendar resource, you can specify this resource while booking your meetings:
Note that, if you create a new calendar resource, it might take up-to 24hours for get activated and for all features to work. Until then calendar events might not get updated automatically.
Sharing a Calendar Resource
Sign in to your Google Calendar account with the login which you would like to use to share these resources.
Find your Calendar Resources
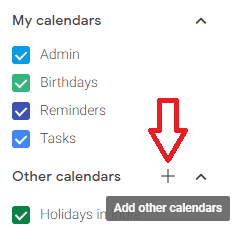
In case you can’t see the calendar resources available to you, follow this process:
- Click on the “Add other calendars” under “Other calendars”
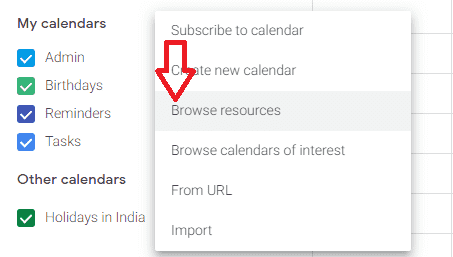
- Select Browse resources
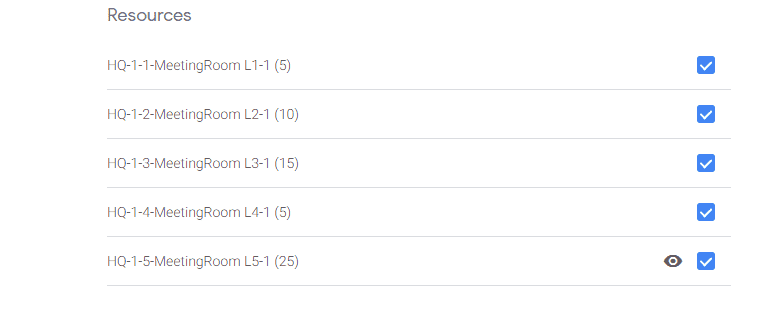
- Select the resources you would like to share/view
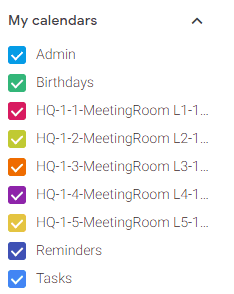
- You will now be able to see these calendars under “My calendars” on the calendar page:
Sharing the Calendar Resource
If you intend to use the admin user account to login to Zoapi Hub, you need not follow this step. However if you intend to use a new user account or a non-admin user, follow these steps to provide them access to the specific calendar resources:
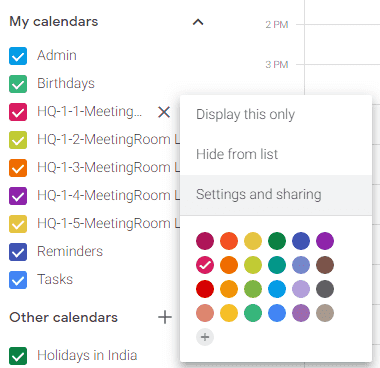
- Select the Calendar that you want to use with Zoapi, click on ‘…’ and choose ‘Settings and sharing’
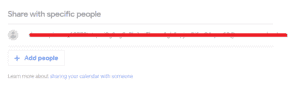
- Under ‘Share with specific people’ select ‘Add people’
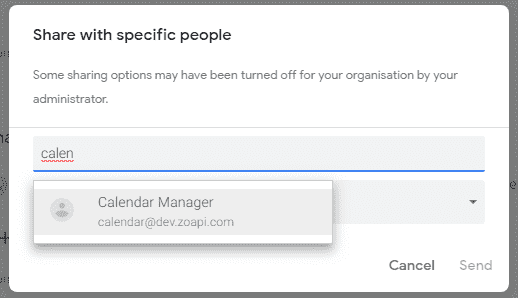
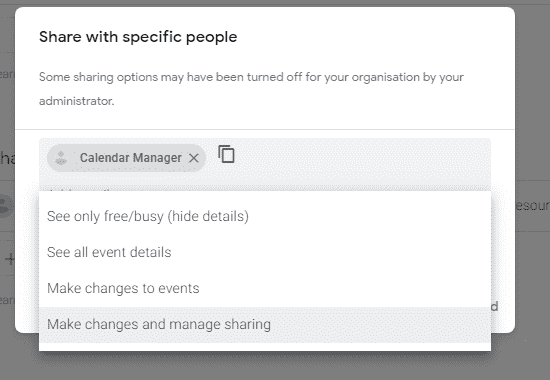
- Add the user email id that you want to use to sign in to Zoapi. Provide ‘Make changes and manage sharing’ privileges
Create an Integration with the Zoapi Dashboard #
- Sign in to your Zoapi dashboard. In case you don’t have an account create one by visiting https://share.zoapi.com/dashboard
- Click on ‘Integrations’ and click on ‘Add’ under ‘Google Calendar’
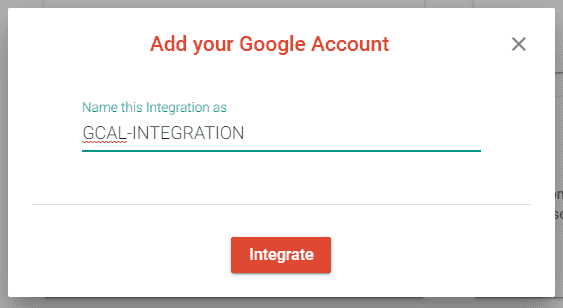
- Give the integration a name of your choice:
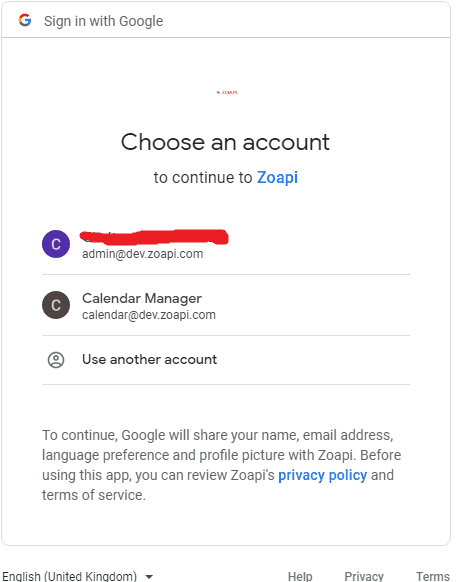
- This will take you to the Google OAUTH authorization page. Sign in with the account you prepared earlier:
- You will be prompted to approve some permissions required by Zoapi. Click on Allow to proceed.
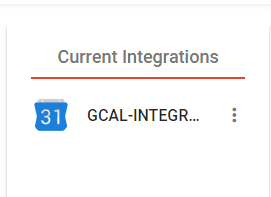
- You should now be able to see an item under ‘Current Integrations’.
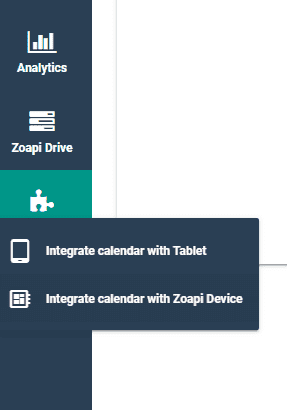
- Now that you have linked your Google account with the Zoapi Hub, you can go ahead and map your calendars to the corresponding Zoapi Hub
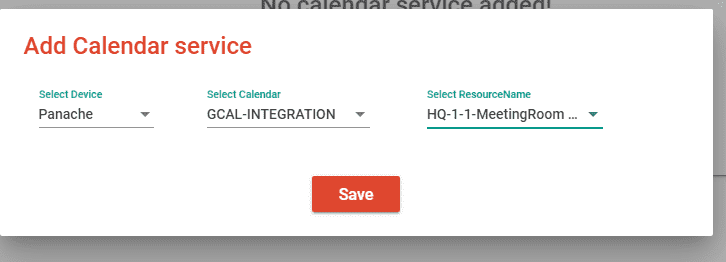
- On the Zoapi dashboard, on the side menu, select ‘Calendar’ and ‘Integrate calendar with Zoapi Device’. Click on ‘Add Calendar Service’
- Under the `Add Calendar Service’ map your Zoapi Hub device to the corresponding calendar and resource and click on save. The dropdowns will automatically list all the available valid choices
That’s it. The Calendar integration is now complete. Your Zoapi Hub device will automatically start showing calendar event details and reminders on its screen.
- Know how Zoapi Room Scheduler app works https://zoapi.com/meeting-room-booking-room-scheduler/
- Watch how to use Zoapi’s online Dashboard https://www.youtube.com/watch?v=mZMBPPlE8QE
- Know more about Zoapi https://zoapi.com/get-quote/


